USB Morse Key
After two years of working with Bastian Bloessl in the same office, he will leave next month to head over to Dublin. Since he is a HAM enthusiast and was learning morse code for the last months, I decided to get him a special farewell present: A USB-Morse-Key! The Idea: Attach a morse key to an Arduino Micro (or any other version with an ATmega32U4 chip), decode the morse code and use the Arduino to send keystrokes to the computer.
My first idea was to build a morse key by myself, but last weekend on the Maker Faire Ruhr I found a guy selling loads of old electronics.

There I found a small morse key that seemd suitable. Back home I rummaged around in my boxes full of electronics stuff (you know, those boxes that everyone has and always wants to sort some day :-) ) and found everything I need, to complete this project:
- Arduino Micro with USB cable
- Banana sockets
- A small plastic box to fit it all in
Quickly measure the distance of the connectors, drill two holes and connect the bana sockets to the Arduino and you’re done! One pin is connected to GND, the other one to a GPIO-Pin, which is set to be input with internal pull-up resistor.

The slightly more tricky part was the firmware, that should distinguish short from long key presses (dots from dashes) and then map this to a character.
I first tried the code from this Instructable, but that didn’t work as expected, so I coded it myself.
The main unit of time is dotDuration, which allows to adjust the speed of the decoder to the skills of the operator by simply changing this variable.
The firmware measures the time (milis()) how long the key is pressed.
If it was less than 1.5 times the dotDuration, it is decoded as a dot, otherwise as dash.
If a pause of more than 4*dotDuration is detected, the received code is decoded and send as a keystroke to the connected computer,
if the pause is more than 10 times of the dot duration, a space character is send.
void loop() {
  state = !digitalRead(PININ);

  if (state) { //morse key down
    if (state != prevState) {
      space=false;
      tStartToken = millis();
    }
  }
  else {
    if (state != prevState) { //only do something, if the state has changed
      tStartPause = millis();
      int duration = tStartPause - tStartToken; //how long was the morse key down?

      lastDurations[bufferPos]=duration; //store duration in buffer
      bufferPos = (bufferPos+1)%DURATION_BUFFER_SIZE;
      updateSpeed();

      if(duration < 1.5*dotDuration) //dot
      {
        inputCode += ".";
      }
      else //dash
      {
        inputCode += "-";
      }
    }
    if((millis()-tStartPause) > dotDuration*4) //pause between two characters
    {
      //check if we can decode already
      if(decodeMorse(inputCode))
      {
        inputCode=""; //we decoded a letter, reset the input
      }
    }
    if((millis()-tStartPause) > dotDuration*10 & space==false) //space
    {
      Keyboard.print(' '); //type a space
      space=true;
      inputCode=""; //reset input, in case we have something undecoded left
    }
  }
  prevState = state;
  delay(5); //debounce
}
These timings are slightly different from the official rules. According to Wikipedia, the duration of a dash is three times the duration of a dot. Dots and dashes are seperated by a pause equal to the duration of one dot and letters are seperated by a pause of three dots. For someone who cannot really morse (me) or who is just learning (Basti), this was a bit to fast. The current values would probably drive someone who speaks morse fluently insane, but for starters it works.
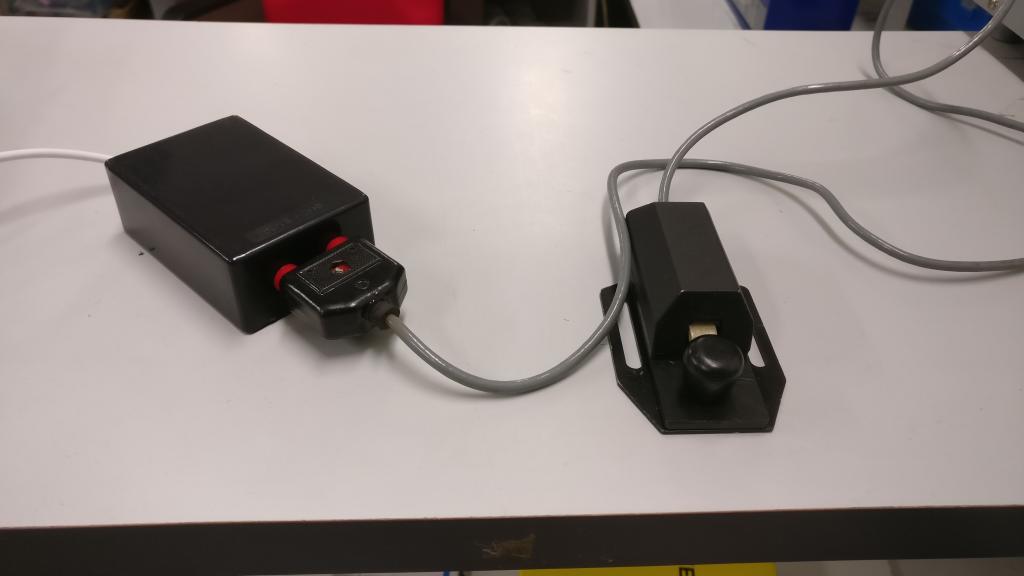
And that’s how the finished Morse-to-USB converter looks like.
Basti tried it out, you can see it in action here:
You can find the complete code here: morseKey.ino